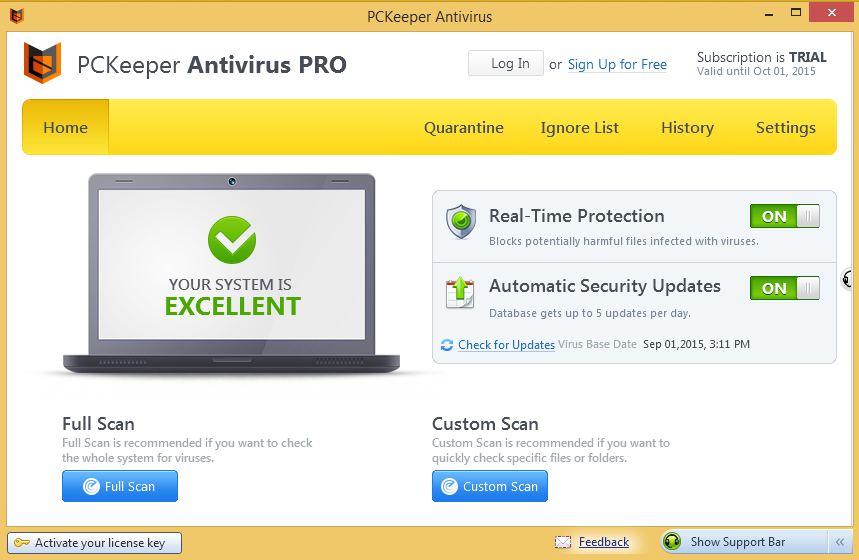
PCKeeper Antivirus is an virus removal application created by Kromtech, it usually starts up automatically and can be used to scan for viruses on computer. Today, in this post, we will learn how can uninstall PCKeeper Antivirus quickly and thorough on the PC.

More information about the application
When install PCKeeper Antivirus, it will additionally add some registry entries to the system and a background controller service, which are used for allowing itself to operate automatically when the computer starts up, but unfortunately, these configurations and files often cannot be removed effectively when you decide to uninstall PCKeeper Antivirus on your computer.
What is an effective removal of PCKeeper Antivirus?
How can be an effective and completely of a program? It means that everything related to the program should be removed during the program uninstallation, and it does not contain any complicated or time-consuming removing steps, for that the complex or cockamamie steps are more easy to create additional errors and problems for the program removal of the computer system. Therefore, here are some useful tips that can help you to uninstall PCKeeper Antivirus smoothly and effectively.
Tips about how to remove and uninstall PCKeeper Antivirus for good
1. Apply professional uninstall to remove PCKeeper Antivirus (suggested)
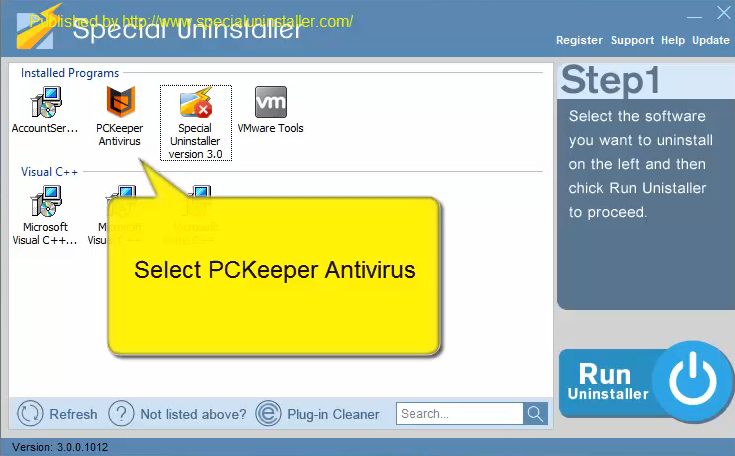
Specific uninstall tool now has been a popular way to uninstall installed programs on the computer, because it always perform more effective in removing the program completely and quickly while comparing to the traditional removal way, which use the Windows uninstall utility to conduct the program removal, a professional uninstall can detect and remove those associated registry entries and start-up settings which are easily neglected by the Windows uninstaller, therefore, let’s take a look at how does the Special Uninstaller help you to uninstall PCKeeper Antivirus quickly and easily.
- Start Special Uninstaller on the computer, find and locate PCKeeper Antivirus in the menu of the interface
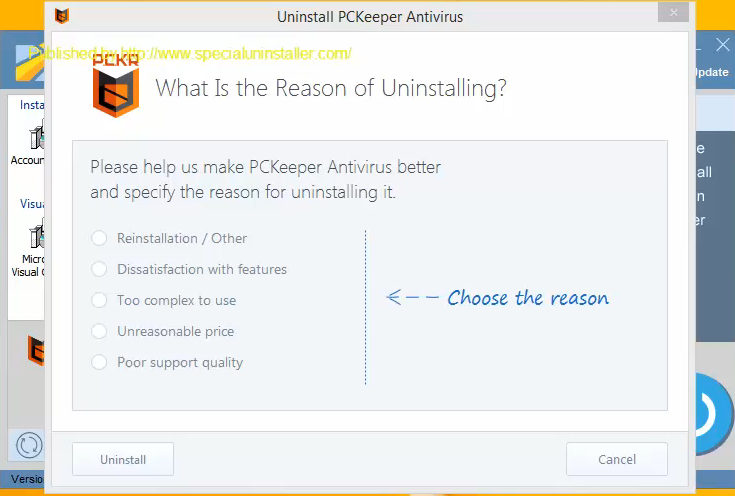
- Click on Run Uninstall, click Yes to make sure you want to uninstall the program, Special Uninstall will start to analyze the program installation on your computer
- Click Yes again on the uninstall wizard, the removing process will be activated
- Following the prompt to uninstall PCKeeper Antivirus, then click on Scan Leftovers button
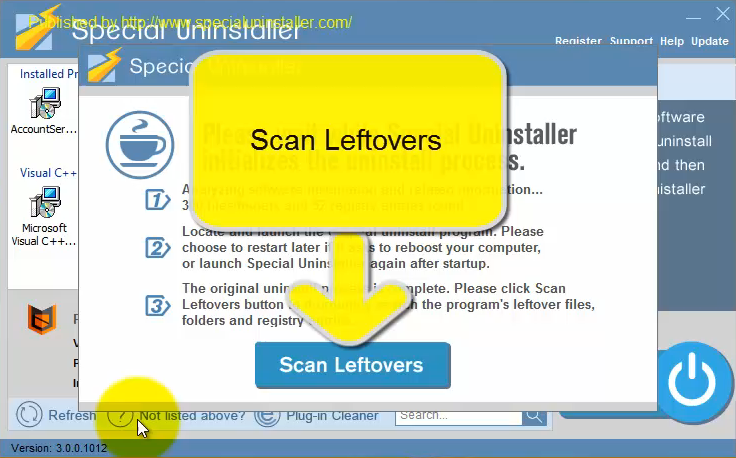
- Click Delete Leftovers to remove all of programs files and registries still leaving on the computer
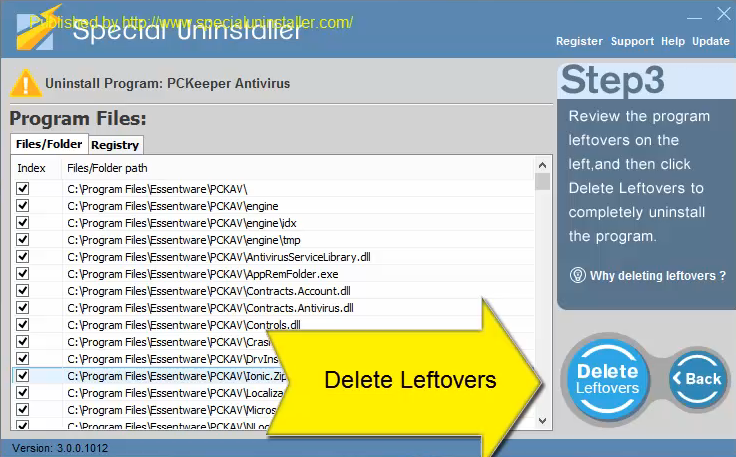
- Click Yes to complete the removal of PCKeeper Antivirus, and go to restart the PC
Here are video tutorials about removing PCKeeper Antivirus with Special Uninstaller:
However, some people may only want to uninstall the program with Windows removing feature as usual, here are some suggestions about how can achieve a complete removal when you decide to manually remove it on your PC.
2. Uninstall PCKeeper Antivirus in traditional manual way
First step: remove it with Windows uninstaller
—–Windows 8.1
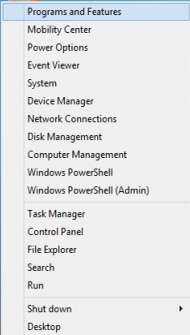
- Right-click on Start icon, select the first item “Programs and Features“
- Locate PCKeeper Antivirus on the list, then click on the Uninstall button
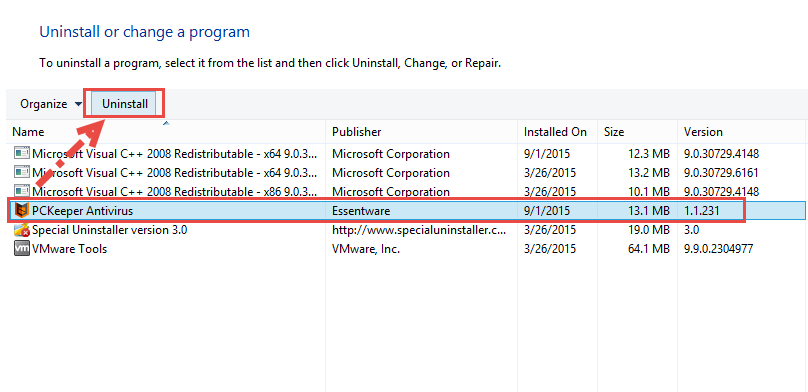
- Click Yes to confirm the removal
- Choose a reason for removing the program, then click on Uninstall button
- Wait till the PCKeeper removing process finishes, then restart your computer
—–Windows 7:
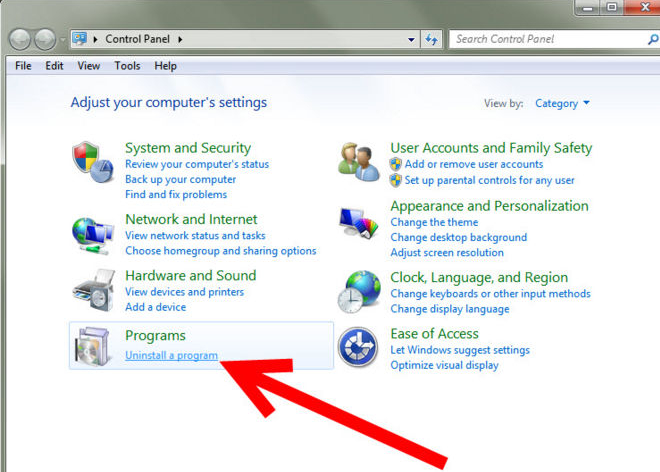
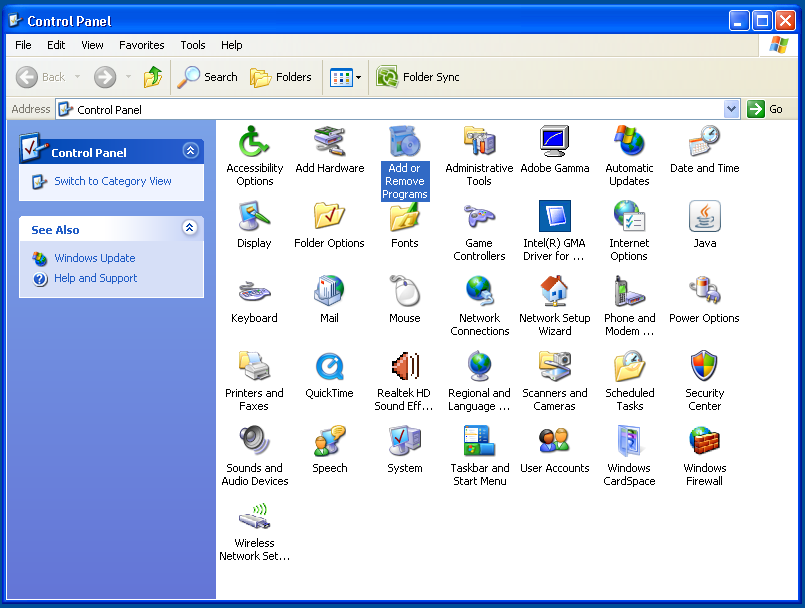
- Click on Start — Control Panel — Uninstall a program
- Select PCKeeper Antivirus on the menu, click Uninstall
- Click Yes to make sure you want to uninstall it, then wait for a few minutes, the removing process will be completed
- Reboot your computer
—–Windows XP:
- Open Start menu — Control Panel — Add/Remove programs
- Highlight PCKeeper Antivirus, then click Change/Remove button
- Click Yes to start the removal
- Restart your PC when it is done
Second step: remove its registry entries on the computer
Please mind that the Windows uninstall cannot help you completely uninstall PCKeeper Antivirus, the next step you should do it’s finding the associated registry entries with the program or developer’s name, then delete them through Registry Editor.
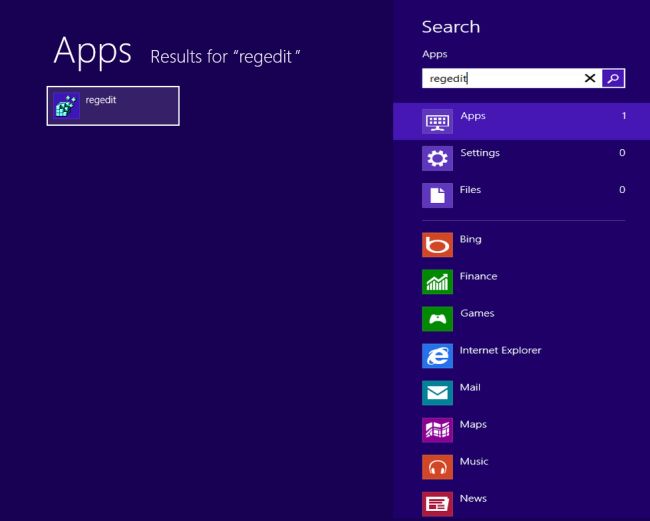
- Type “regedit” in the search box, and open Registry Editor
- Expand the registry group to find out those entries related to the PCKeeper Antivirus, and delete them
Note: don’t go to delete the registry entries just after you removing PCKeeper Antivirus with Windows uninstaller, restarting the computer is a necessary step to complete the first stage of removal, and some registries will be deleted after the restart.
Professional uninstaller VS Windows uninstaller
Both the above ways can be used to uninstall PCKeeper Antivirus on computer, so it’s up to you to choose the way you like. Even though, applying an uninstaller can save much of time and effort to dealing with the program removal, especially when you need to uninstall a complicated and large program like WordShark and Bitdefender Antivirus Plus 2015, the Windows uninstall feature usually cannot completely remove a program on the PC, some files especially the registry entries and associated data to enable the program start up automatically are often missed by the removal.
Therefore, in order to handle the program removal more effectively, Special Uninstall will do a great help for you and uninstall them easily and thoroughly on your PC, and many other special removing features available on the uninstaller will help you resolve different kinds of removing problems.
Leave a Reply