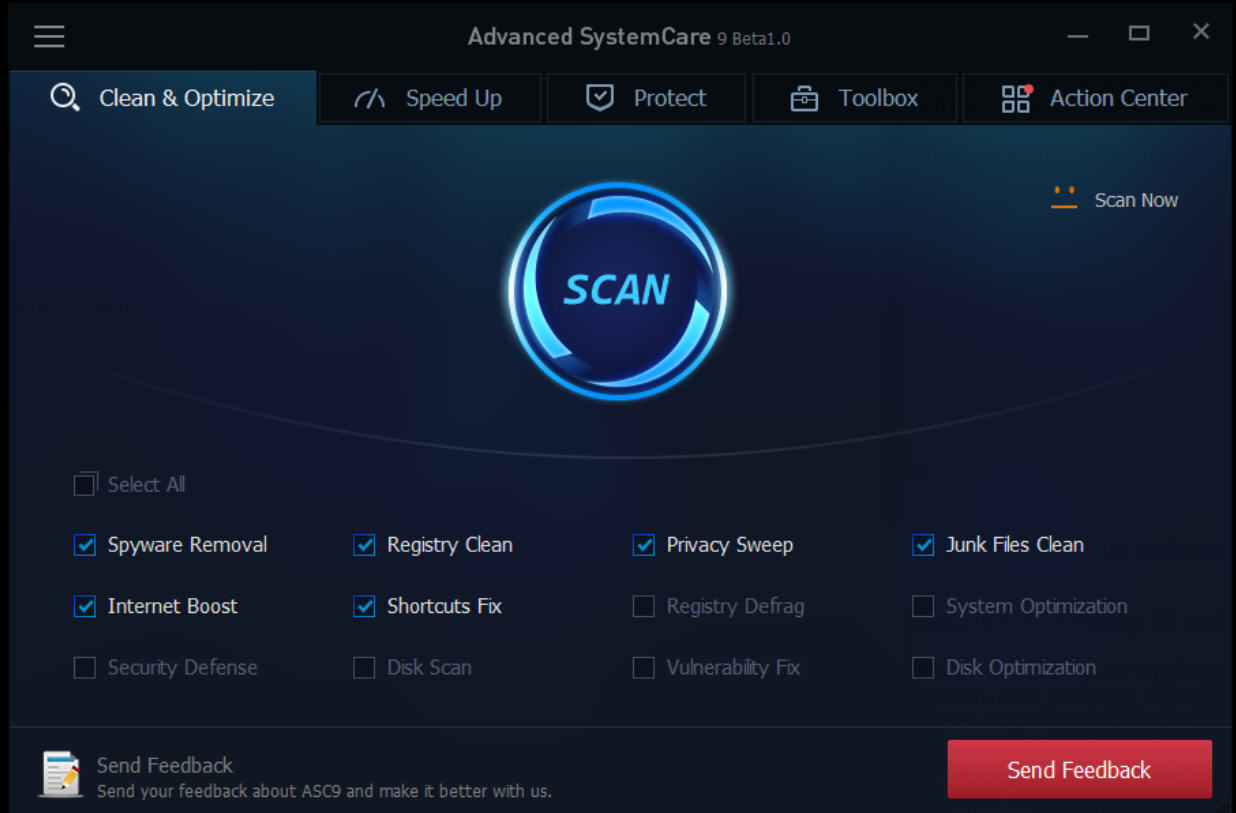
The free version of Advanced SystemCare provides only three features to improve the performance of your operating system, but if you paid for its full version with $19.99, you’ll obtain many more functions on this optimizer.
Lots of users may wish to remove Advanced SystemCare because its installer package is made as a collection of IObit’s other products, e.g. Surfing Protection, so-called IObit Apps Toolbar (by Spigot, Inc.). The program does take much disk space, so if you don’t really need it and want to free up some system resources for more important purposes, just perform the removal without hesitation. And don’t forget to check for other IObit products that may have been installed without notice.
In the following content I’ll teach you how to effectively remove Advanced SystemCare through 3 different methods. Scroll down to browse the whole page and pick your favorite way to complete the job.

Method 1: Remove Advanced SystemCare with A Safe Cleaning Tool
The first one I would like to introduce is an easy-to-use, small-sized tool that applies to all the popular Windows OS versions. You can also try to uninstall other programs that are not welcome anymore in the system with it. How does it work? Take a quick look below:
1. Click any of the blue download buttons on this page or visit the homepage to download Special Uninstaller.
2. Run it, and you can see clearly what programs are installed currently. Choose Advanced SystemCare and hit Run Uninstaller. It will scan for all the related files and get ready for your next request, during which you may be asked for confirmation of this removal, just click Yes/OK to proceed.
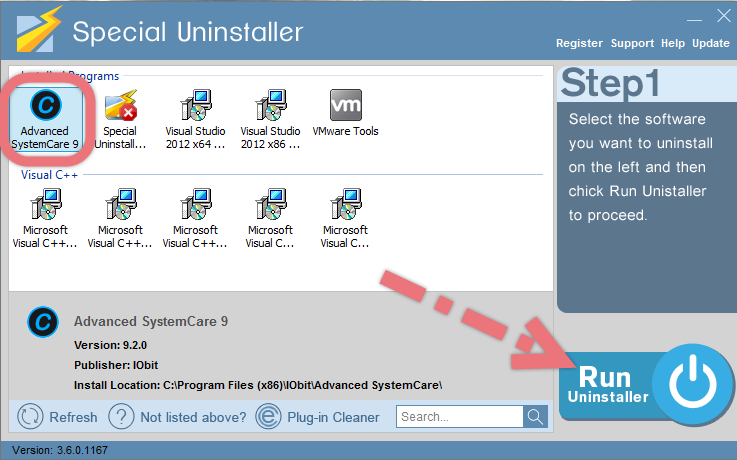
3. Click Scan Leftovers when it turns to blue, then you see the all the vestiges that most users will forget to delete during the manual removal. Click Delete Leftovers to fully remove Advanced SystemCare.
Clicking ![]() to refresh the list of currently installed programs, and check whether your target is no long there.
to refresh the list of currently installed programs, and check whether your target is no long there.
Method 2: Manually Remove Advanced SystemCare Yourself
1. To smoothly conduct the removal process, you’d better log in the system as an Administrator, so that you won’t be asked for password permission all the way. In most cases we log in Windows as an Administrator at home as the default settings. (How to check for administrator rights in Windows?)

2. Right-click on Advanced SystemCare icon on the System Tray, and select Exit to close the program.

3. Hit Ctrl + Alt + Del to run Task Manager, terminate Performance Monitor by selecting it in the Processes tab and clicking End.

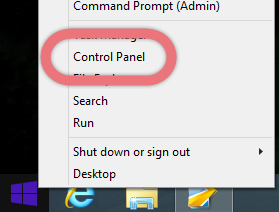
4. In the bottom-left screen of your screen, right-click on the Windows logo and select Control Panel.
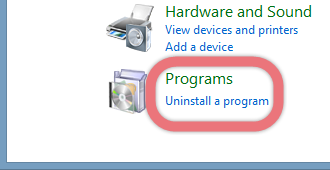
5. In the Control Panel window, click the Uninstall a program link.
6. In the list of installed programs, find & double-click Advanced SystemCare to activate its default uninstall wizard.
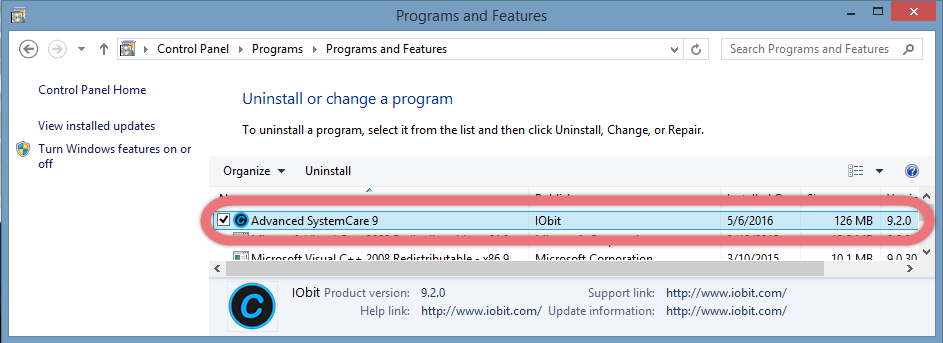
7. Follow the prompts to proceed with the removal, provide confirmation when it’s needed, then wait for the uninstall wizard to finish its job.


8. Hover your mouse in the bottom-right corner, then you see the charms bar. Click Search, enter “regedit” to open the Registry Editor.

9. On the navigator of the Registry Editor, click File > Export to create a back-up (.reg file) of the whole Registry in case of any irretrievable mistake. (How to restore the Registry in Windows?)

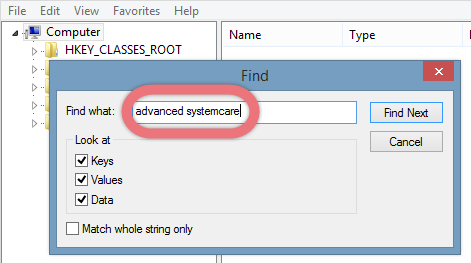
10. Then on the navigator click Edit > Find…, type “Advanced SystemCare” in the box to find the related entries/keys, then delete them to completely remove Advanced SystemCare.
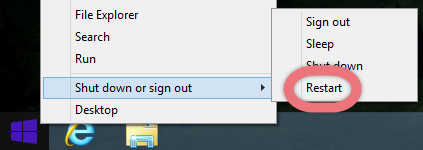
11. Reboot your computer to take effect.
Method 3: Remove Advanced SystemCare through System Restore
Every version of Windows OS since XP provides an option called System Restore that allows your PC to revert back to an earlier status. In later versions of Windows you can easily locate it by typing “restore” into the search box of Start menu or the Start Screen on Windows 8. Specific steps are as follows:
1. Also, you need an Administrator account or password permission to do this.
2. Hover your mouse in the bottom-right corner, and the charms bar will come out. Select Search, type “Restore” in the box, and open Create a restore point.

2. On the System Protection tab, click System Restore…

3. You’re suggested viewing the drivers and programs that will be affected, making sure whether Advanced SystemCare will be deleted and what other programs will be gone. To do that, click Scan for affected programs.
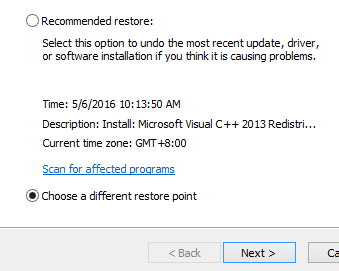
4. Then select the restore point you refer. If you don’t like to restore the system to the recommended point, click Choose a different restore point that will remove Advanced SystemCare, and hit Next.
5. At last, review the restore point, and click Finish.
Before trying any new piece of software that you’re not sure if it’s safe to run, I suggest using Create a restore point, so that if later you regret the installation, you get to to literally “turn back the clock,” wiping out the program like it never existed. (Want to delete restore points?)
How Do I Optimize the System without Using an Optimizer?
You may be wondering: what if my system is running pretty slowly, and I have no clue how to fix it after I remove Advanced SystemCare?
Actually there are quite a lot of ways you can try, such as limiting the number of programs run at startup, defragmenting your hard disks, running few programs at the same time, turnning off visual effects, and restarting regularly. See how Microsoft teaches optimizing Windows for better performance, prove to yourself that practical knowledge can be obtained through a few minutes’ reading. 😀
I want to uninstall QuickTime (Suggested) I want to uninstall Virtual DJ 7

Leave a Reply