
Are you frustrated and tired of getting error messages when you try to Uninstall Nero through the standard Windows Add/Remove Programs? Let’s take Nero 11 for example. If you have Nero 11 and want to back to the older smoother version of Nero 7,8,9, you will have to uninstall the current version. Similarly, those who are using the trial version of the Nero 11 will also need to remove Nero 11 so as to install the licensed version.

Uninstall Nero 11 Using the Windows Default (Add/Remove Programs) Uninstaller
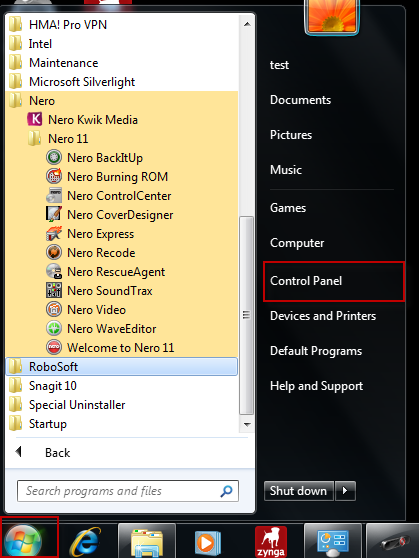
1. Click on the START menu==> Control Panel
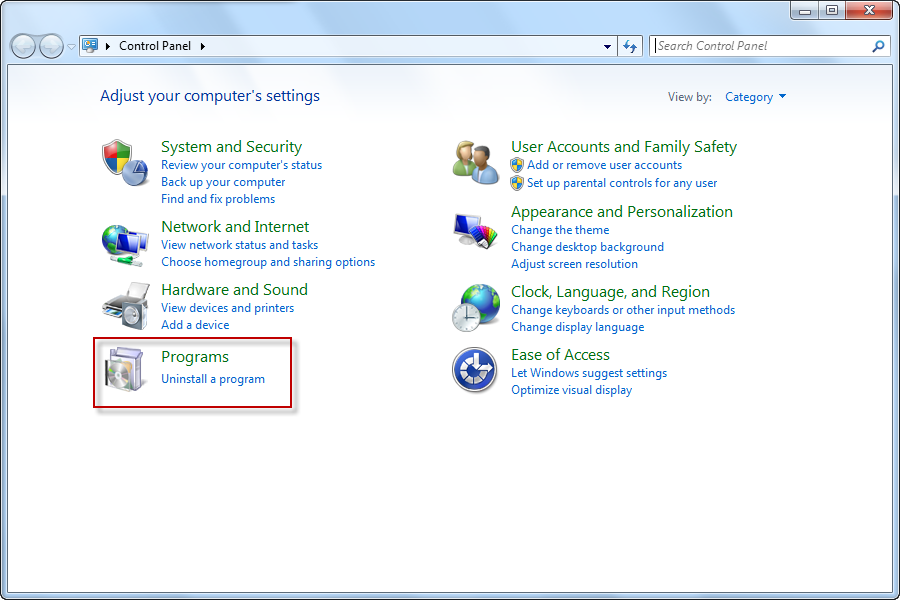
2. Select Uninstall a Program
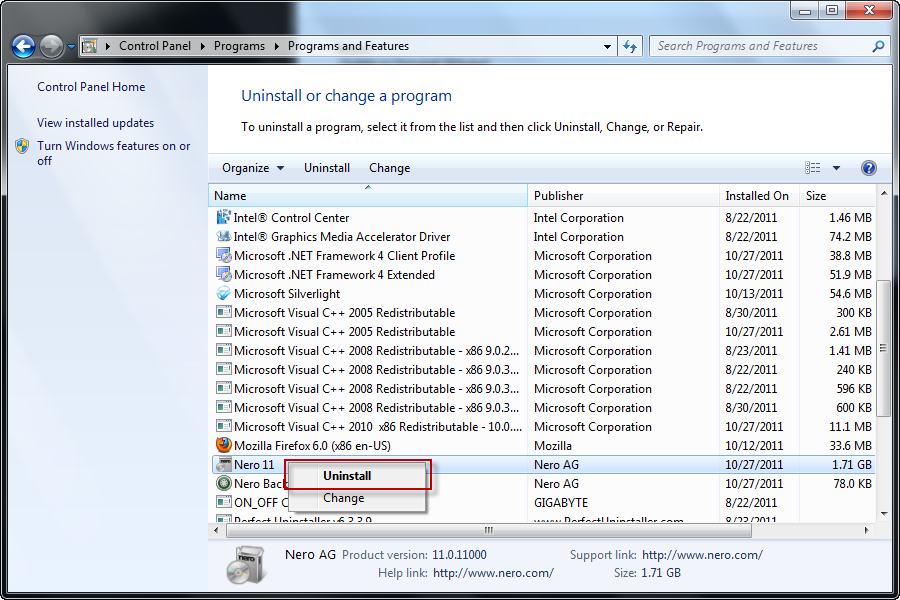
3. Scroll down and highlight the program Nero 11, Once done Click on uninstall.
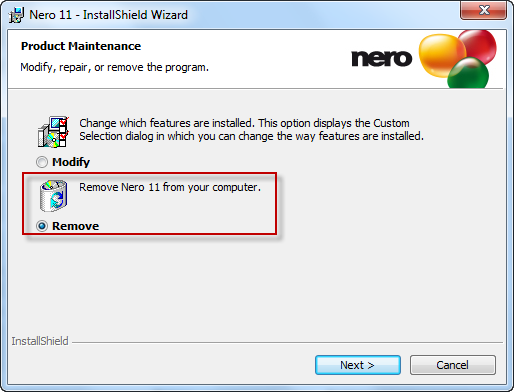
4. Choose Remove to start the uninstall process.
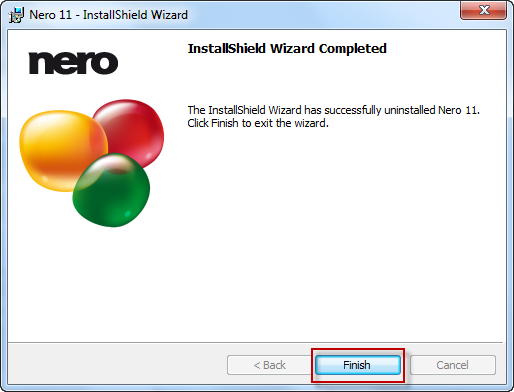
You will probably find it will not work. During the uninstall of Nero 11, they start getting all sorts of problems like “Screen Freeze” and “Uninstall Error” messages of either a “missing DLL file” or a message that says “xxx file is missing, uninstall unsuccessful”.

Why is it so hard to uninstall Nero11 completely from your computer
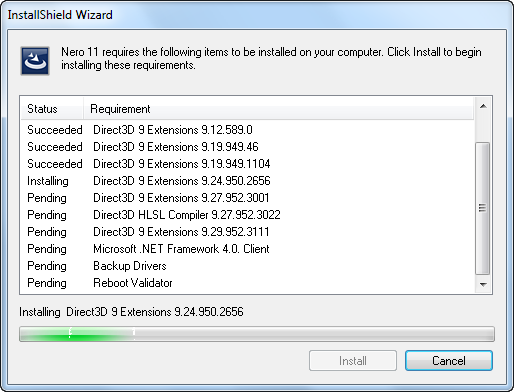
See whenever you download and install Nero 11 onto your computer, a number of process were required to install Nero 11. That makes your computer to run extremely slowly and get really sluggish over time.
Consequently, you have to go through your Windows registry to remove the some files and remnants of Nero 11.
1. Click on Start, select Run. Type in ‘regedit’ in the pop up box and hit the enter key
2. In the registry editor find the following registry keys and delete them
(HKEY_CURRENT_USER\Software\Nero)
(HKEY_LOCAL_MACHINE\Software\Nero)
(HKEY_LOCAL_MACHINE\Software\Microsoft\Windows\CurrentVersion\Run\eg ne)
3. Now Click on the START menu and go to the Control Panel and then Folder Options then View and choose Show Hidden Files and Folders
4. Now go to C:\WINDOWS\inf which is a folder and then delete the related file of Nero program.
5. Restart your PC and when It loads up delete the following folders
6. C:\Program Files\Nero
(C:\Document and Settings\All Users\Application Data\Nero)
(C:\Documents and Settings\%USER%\Application Data\Nero)

For for the sake of your computer security, you’d better try something that is much more safe and effective to uninstall a stubborn program like Nero 11 from your system. Using the Nero 11 uninstaller like Special Uninstaller is one of the best ways to uninstall Nero 11.
How To completely uninstall Nero 11 when Windows Add/Remove programs can’t.
With Special Uninstaller, you will be able to accomplish a thorough removal of the Nero 11 automatically.
- STEP 1. Free download Nero 11 Uninstall Tool and Install It.
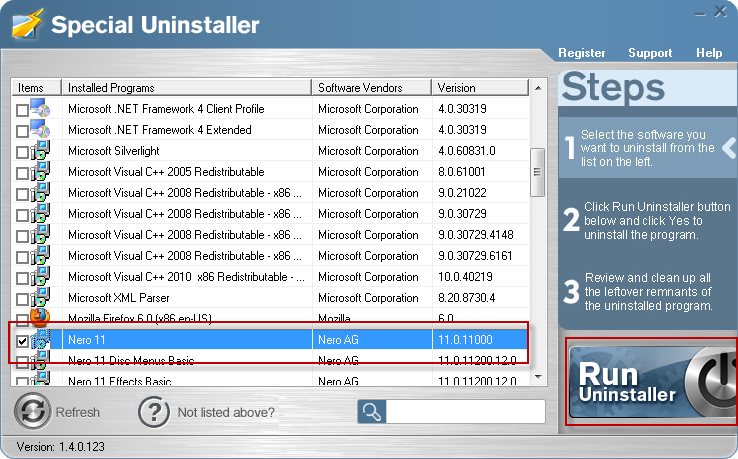
- STEP 2: Select Nero 11 from the detected program list and click “Run Uninstaller”.
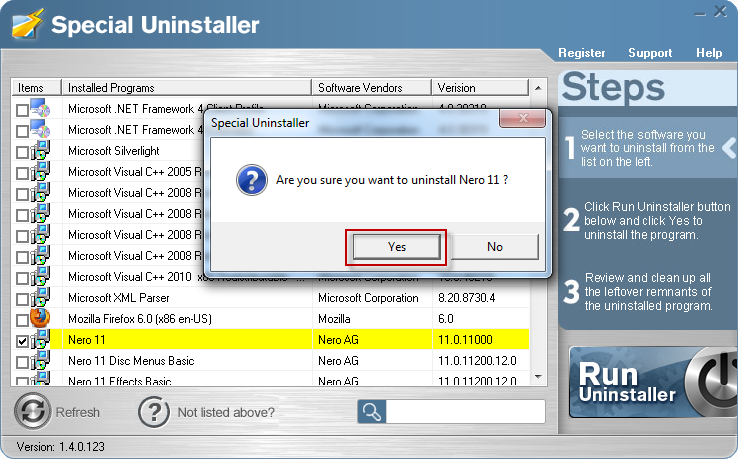
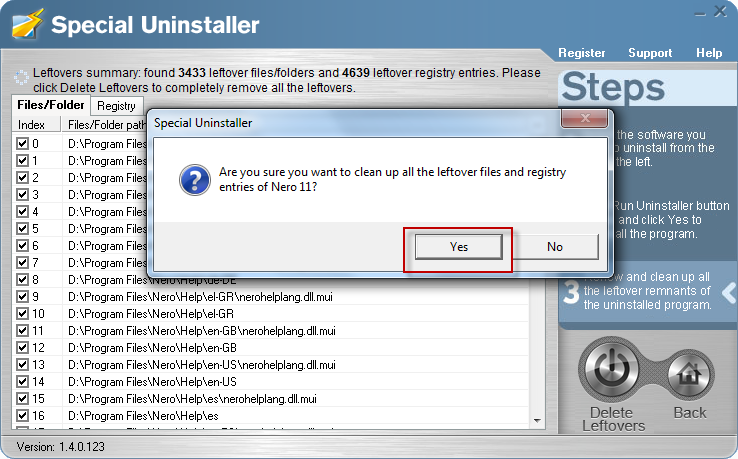
- STEP 3: Click “Yes” button to start the uninstall Nero 11 process.
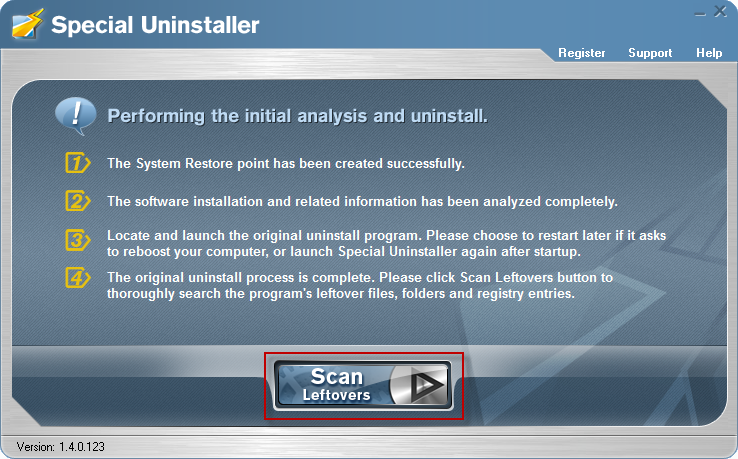
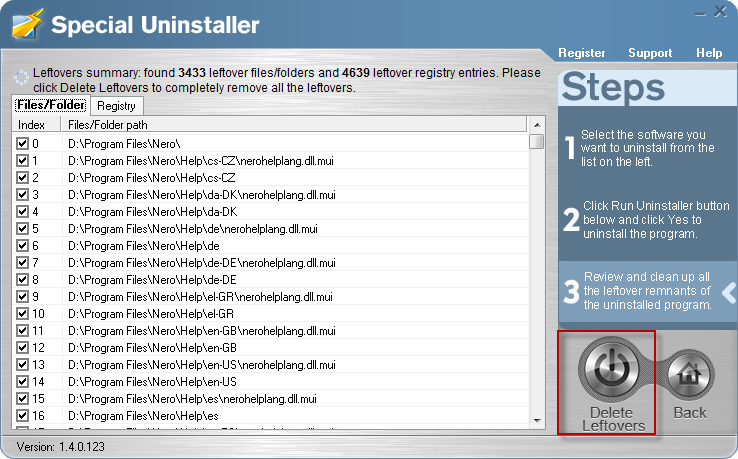
- STEP 4: Wait for the standard uninstall process to be completed and select Scan Leftovers to detect leftover files/registry entries and click Delete Leftovers.
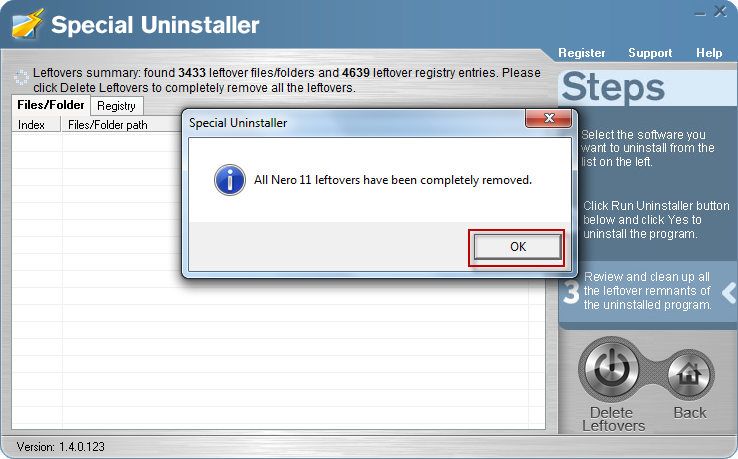
- STEP 5: Click “OK” to finish the Nero 11 uninstall process.
Video Guide: How to Remove & Uninstall Nero 11 and Trial Versions Completely Using Special Uninstaller

As you can see that, Nero 11 has been finally removed from your computer after the simple clicks above. Meanwhile, Special Uninstaller also remove all the traces of Nero 11 left behind in your registry and system disk that the standard Windows “Add/Remove” utility can’t.
Leave a Reply