
Windows Live Messenger, created by Microsoft, is an instant messenger client that enables users to stay connected with each other. With Windows Live Messenger, the subscribers can share pictures, customize the chat client themes or skins and send multiple instant messages to thier friends, family and peers. However, not everyone likes to choose Windows Live Messenger as their preferred software and it takes time to uninstall Windows Live Messenger from their computer. Unfortunately, it is not a easy- to-remove software which is only easy-to-install. Let me explain why.

Why is it so hard to uninstall Windows Live Messenger
Windows Live Messenger is unquestionably an convenient chat application that enables us keep in contact with our friends. But look at the following picture…

Do you know these extra appliances are installed in your machine as a “bundle” of applications into one single installation whenever you download and install Windows Live Messenger software onto your system. That makes your computer run extremely slowly and get really sluggish over time.
There is another problems about Windows Live Messenger removal
Sometimes Windows Live Messenger keeps reinstalling itself on your system when you get windows updates. It is the result of leftovers file and registry entries on the system. Therefore, if you have uninstall Windows Live Messenger by using control panel program you also need to delete file path from the system registry. To do this you have to:
Delete invalid files and registry entries of Windows Live Messenger
Click Start, Run and input Regedit, and then click Enter to get access to the registry. Delete all the following keys:
[HKEY_CLASSES_ROOT\Windows Live]
[HKEY_CURRENT_USER\Software\Classes\Applications\WindowsLive.exe]
[HKEY_CURRENT_USER\Software\Windows Live]
[HKEY_CURRENT_USER\Software\Windows Live Plugins]
[HKEY_LOCAL_MACHINE\SOFTWARE\Windows Live]
[HKEY_LOCAL_MACHINE\SOFTWARE\Windows Live.org]
[HKEY_LOCAL_MACHINE\SOFTWARE\Windows Live Plug-in]
Why spending so much time and energy to remove Windows Live Messenger? Your best bet is to use an uninstaller and get the job done in no time at all.
How to uninstall Windows Live Messenger automatically and quickly
- STEP 1. Download Windows Live Messenger Uninstall Tool and Install It.
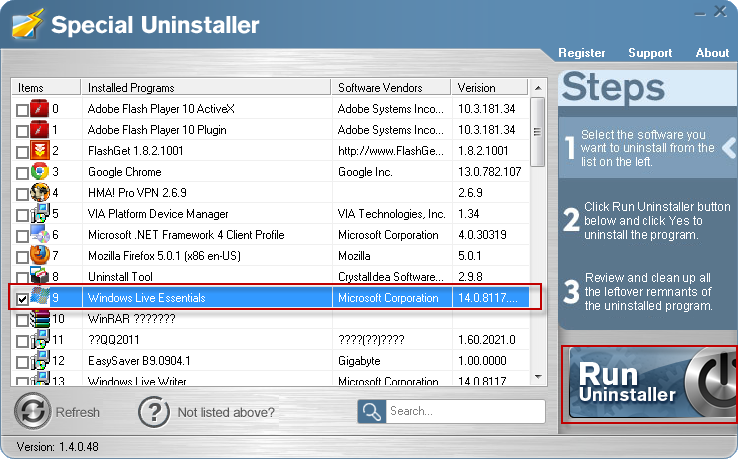
- STEP 2: Select Windows Live Messenger from the detected program list and click “Run Uninstaller”.
- STEP 3: Click “OK” button to start the uninstall process.
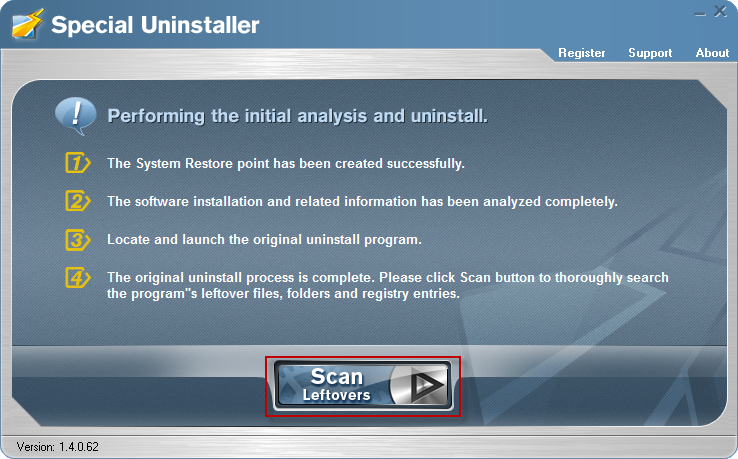
- STEP 4: Wait for the standard uninstall process to be completed and select Scan Leftovers to detect leftover files/registry entries and click Delete Leftovers.

- STEP 5: Click “OK” to finish the uninstall proces

Leave a Reply