Here we have specific instructions for you to correctly remove Avira Antivirus 2019, for any part you want to ask about or anything we missed, just leave your comments at the bottom.

System security is always a primary problem to take care of, so you may have seen that more and more antivirus software products are coming in sight, the choices are quite enough to get you lost. Picking the wrong one might bring a lot more troubles than you think.
The Avira Antivirus 2019 we’re talking about is one of those that offers detection & deletion for virus, Internet connection repair, real-time blocking, E-mal notifications, and schedule while using very little system resources, blah blah blah, as it claims on the official site. Personally, the introductions of all the antivirus products are pretty much the same to me. But what else the developers should say besides that? 😀
Well, let’s just cut to the chase and see how to remove Avira Antivirus 2019 from your PC right here, right now.

Specific Steps to Remove Avira Antivirus 2019
1. Right-click on the Avira Antivirus 2019 icon on the System Tray, and select Exit to close the program.
2. Hit Ctrl + Alt + Del to run Task Manager, terminate the processes related to Avira Antivirus 2019 by selecting it in the Processes tab and tapping End Task.

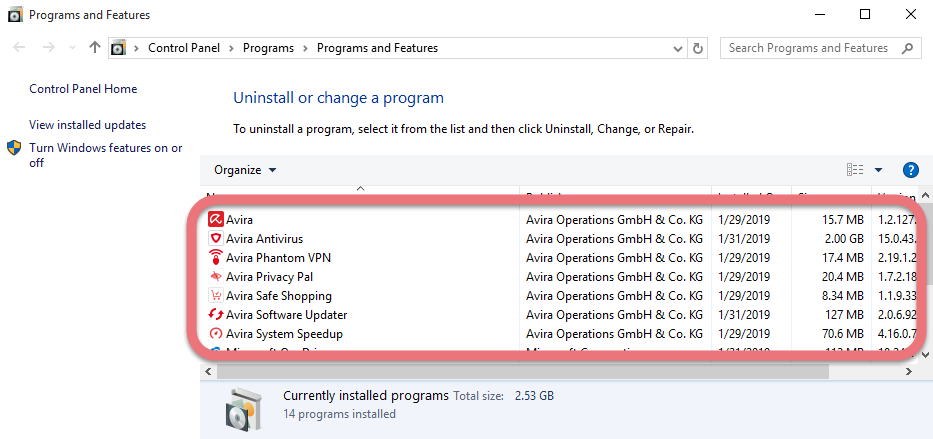
3. Right-click on the Start button and select Programs and Features.
4. In the list of installed programs, find & double-click Avira Antivirus to activate its default uninstall wizard.
5. Follow the prompts to proceed with the removal, provide confirmation when it’s needed.

6. When you see the following options, select any of them to proceed and click Continue.
7. Hover your mouse in the bottom-right corner, then you see the charms bar. Click Search, enter “regedit” to open the Registry Editor.
8. If there is no other Avast products installed in your computer, locate and delete this folder: HKEY_CURRENT_USER\Software\Avira Antivirus
9. Reboot your computer to take effect.
A Simpler Way to Remove Avira Antivirus 2019 & Other Unwanted Programs
Another solution I would like to introduce is an easy-to-use, small-sized tool that supports all the popular Windows OS versions. You can also try to uninstall other programs that are not welcome anymore in the system with it. How does it work? Take a quick look below:
1. Click any of the blue download buttons on this page or visit the homepage to download Special Uninstaller.
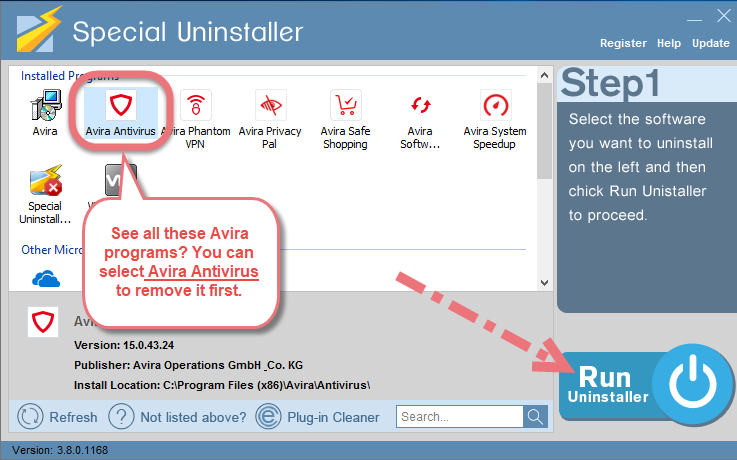
2. Run it, and you can see clearly what programs are installed currently. Choose Avira Antivirus and click Run Uninstaller.
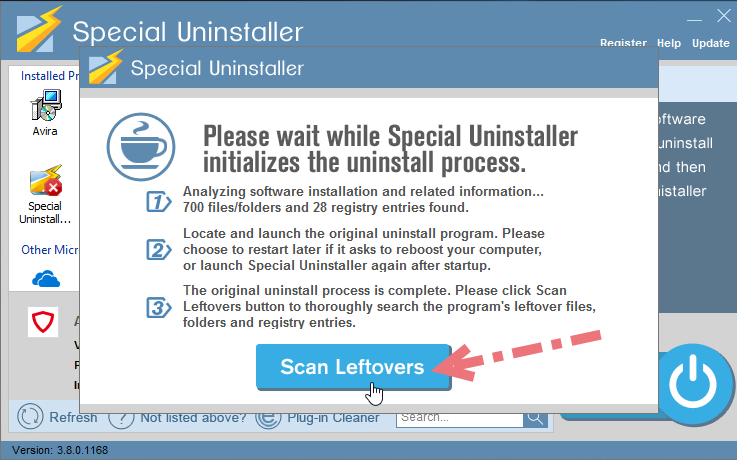
It will scan for all the related files and get ready for your next request, during which you may be asked for confirmation of this removal, just click Yes/OK to proceed.
3. Click Scan Leftovers when it turns to blue, then you see the all the vestiges that most users will forget to delete during the manual removal. Click Delete Leftovers to fully remove Avira Antivirus 2019.
Clicking Back to refresh the list of currently installed programs, and check whether your target is no long there. You can perform the same steps to remove other needless programs and free up some disk space. I do hope this recommendation can be a better removal solution to you anytime.
Is it OK to multiple antivirus products?
Noooooo. You should never run more than one antivirus software at the same time. Together they could slow down your computer and might even identify each other as a virus, which could lead to file corruption or other conflicts and errors that make your antivirus protection less effective – or not effective at all.
Leave a Reply