
Have tried many ways to uninstall IsoBuster Toolbar but it still appears on the browser? Do you get the point to get rid of this browser extension? You will be in the right place if you want to learn some ways to remove it on the computer from this post.

What’s IsoBuster Toolbar
IsoBuster Toolbar is a browser add-on that often installed on the browsers like Internet Explorer, Google Chrome and Mozilla Firefox. IsoBuster program often bundles with this toolbar and embeds it in the browser during the program installation, which will present the various functionalities of IsoBuster directly from the Web browser.
Problems of IsoBuster Toolbar removal
No matter how it claims to be helpful for the use of computer, many people prefer to clean it from their web browsers for its annoying behaviors. And this, is just what the problem many people wish to resolve — smoothly and completely uninstall IsoBuster Toolbar. Generally, these removing problems will prevent people to clean it on browser:
Failure removal. People cannot find any feature or process which can diable and remove the toolbar on the browser.
Incomplete removal. Even though had disabled and delete it via the advanced settings in browser, the toolbar still can be seen after restarting the browser.
Proper ways to uninstall IsoBuster Toolbar on the browser and PC
Manual way to get rid of the toolbar
Remove virus infections with antivirus program
If you suspect that there is a virus infection on the computer, please take the first step to check your computer security with a powerful antivirus application, after ensuring the computer is in a safe situation, you can get start to uninstall IsoBuster Toolbar on your PC.
One – remove IsoBuster Toolbar process
Click to open the Start menu > Control Panel > Add/Remove programs
(for Win 8 users, click This PC > Computer > Open Control Panel)
Select IsoBuster Toolbar process on the list, click on the remove button to start the uninstallation
Two – clean the toolbar on all of installed browsers
On Google Chrome
- Open Google Chrome, click on the menu icon (with three bars)
![]()
- Click on Tools, and then Extensions
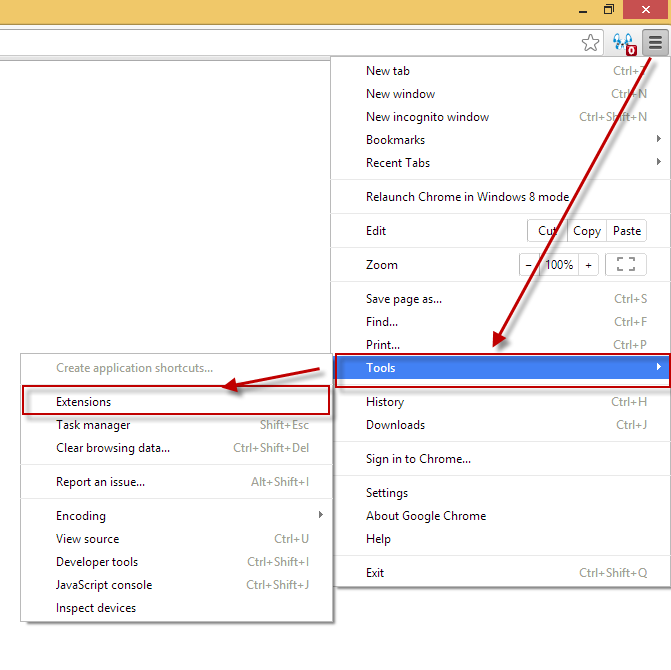
- Disable and remove IsoBuster Toolbar and other unknown toolbars
- Go to the setting section, click “Manage Search Engine…”
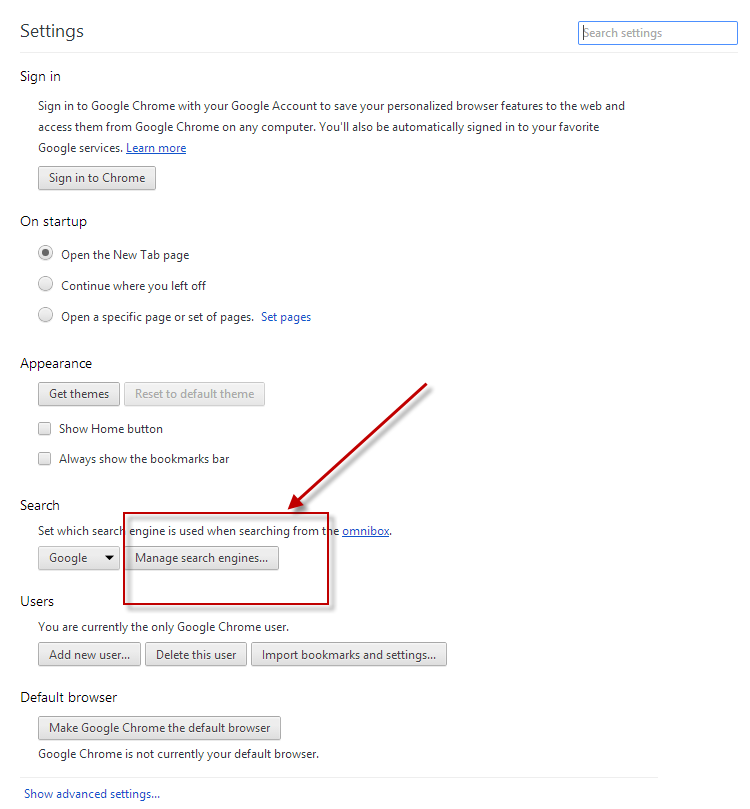
- Change your default search engine to avoid the one which associated to the IsoBuster Toolbar toolbar
- Restart your computer
On Internet Explorer
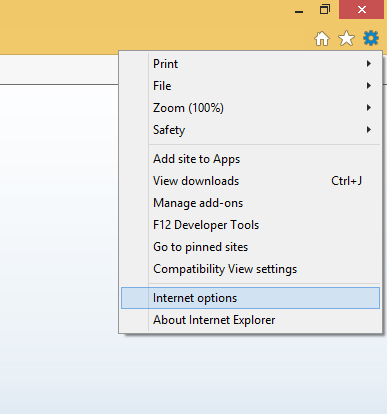
- Open Internet Explorer, click on Tools or the gear icon at the top, and select Internet Options
- Go to the Advanced tab in the Internet Options window, click on Reset button on the right side
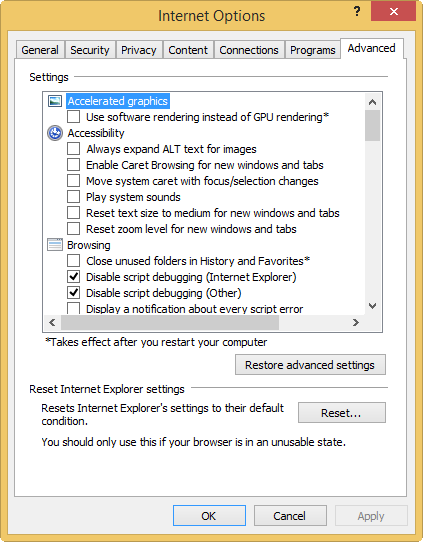
- Continue and go to the Delete personal settings box, click on Reset
- Close the window when the resetting is completed, click OK
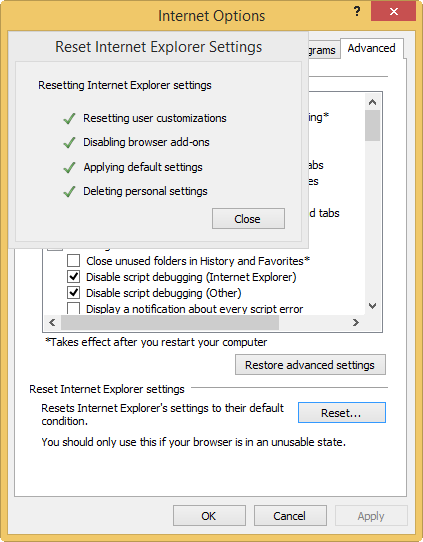
- Restart the Internet Explorer
On Mozilla Firefox
- Open Firefox, click on Firefox button at the top left corner, click on Help
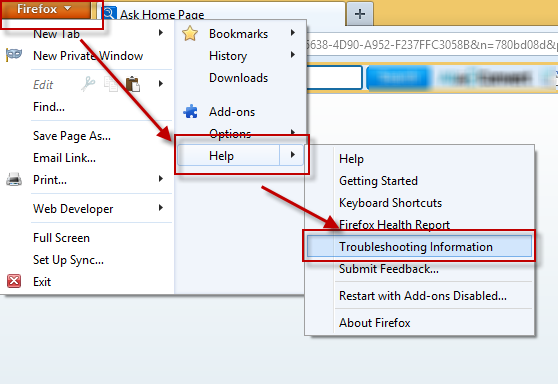
- Select “Troubleshooting Information” on the Help sub-menu
- Then you will receive a confirmation window, click on Reset Firefox to continue the resetting

- Allow the Firefox to be closed, it will open again, and your Firefox will be reset
- Click on Finish when there is a pop up telling you about the changes
It is for sure that the manually cleaning the toolbar on PC will takes you some time and energy, if you want the IsoBuster Toolbar removal can be much easier but also removed thoroughly, it is recommended to use Special Uninstaller, an automatic and advanced uninstall tool.
Automatic way to uninstall IsoBuster Toolbar
Besides the manual removing solution, automatic removal with a professional uninstaller is another way that is much more popular and effective in cleaning the toolbar completely and quickly on the web browser. Different from the manual way, a good uninstall tool can help the user to identify and remove all of associated applications and components on the computer, and all of these removing jobs will be done in an automatic way, thus, people can resolve the troublesome issue within a short time.
Special Uninstaller is just such a qualified uninstall tool that can firstly uninstall the associated application on the computer, and then disable and clean the toolbar on browser via activating its “Plug-in cleaner”. Here are the steps about how to uninstall IsoBuster Toolbar thoroughly with Special Uninstaller:
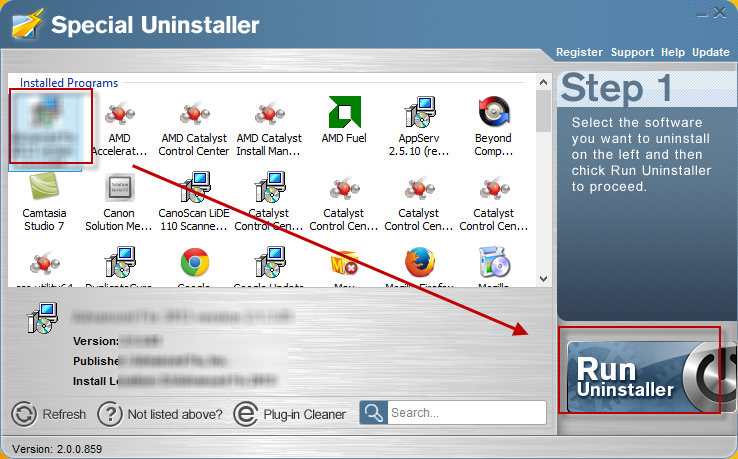
1. Open Special Uninstaller, find and select the program related to IsoBuster Toolbar
2. Click on “Run Uninstaller”, and “Yes” to start the first stage of removal
3. When it is finished, click on Scan leftovers”
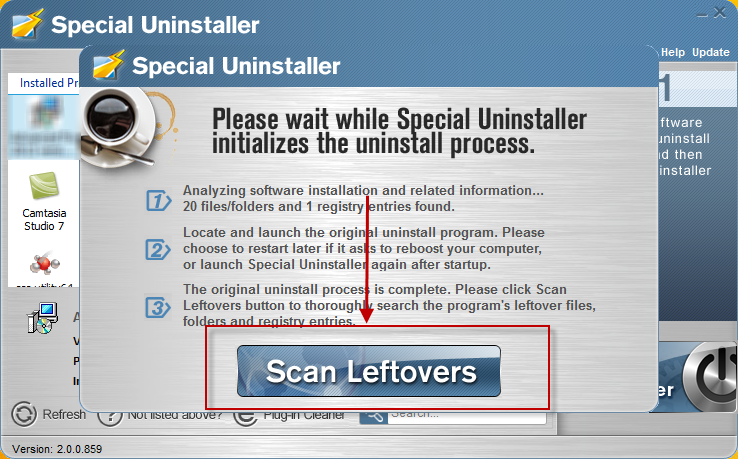
4. Click “Delete Leftovers” button to clean all of detected leftovers, and back to the interface of step one
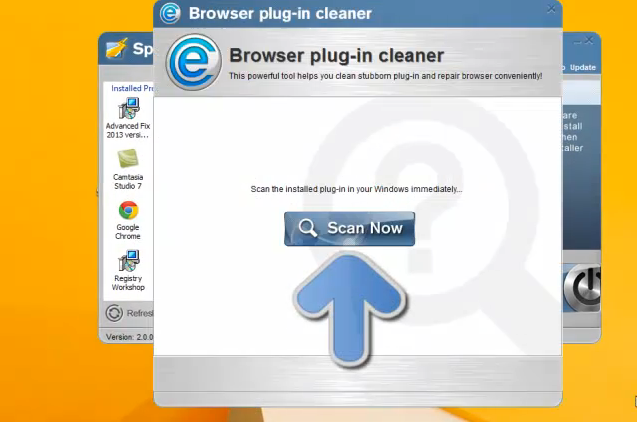
5. Move your mouse to the bottom of the program, click on “Plug-in Cleaner”

6. Click “Scan Now” to check all toolbars on the browser
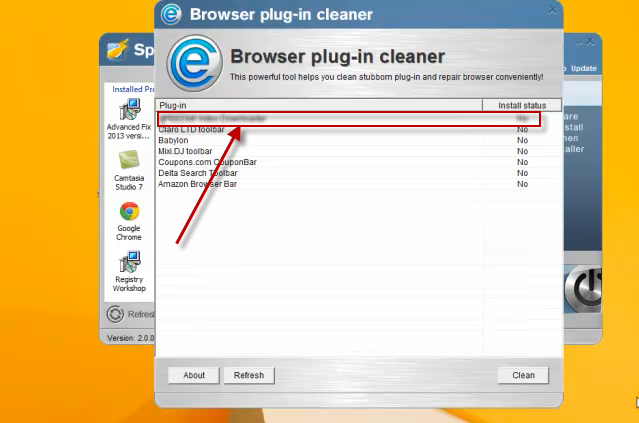
7. Select IsoBuster Toolbar, and click on “Clean”
Click here to uninstall IsoBuster Toolbar with Special Uninstall:
Leave a Reply