This page is teaching how to correctly uninstall AnyDVD on your PC. Through the reading you’ll know how to deal with other unwanted programs.
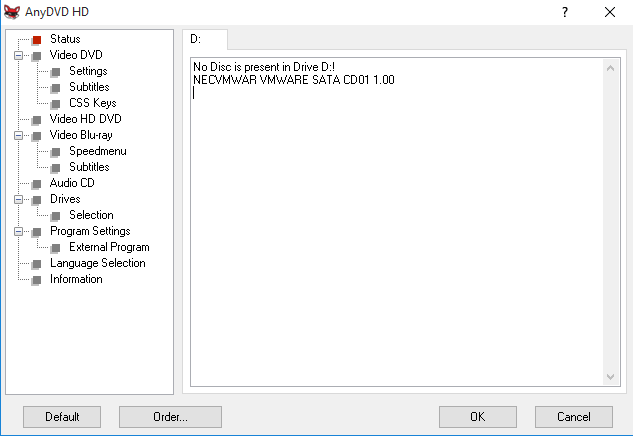
AnyDVD is a Windows based application that removes restrictions of DVD and Blu-ray media automatically, transparently in the background. It can enable read access of contents of a movie DVD or Blu-ray as soon as it’s inserted into the drive. It can also optionally disable RPC region codes, thereby making the movie region free and comfortably viewable on any DVD/Blu-ray player and playback software.
In the following part, you will find two different solutions to correctly uninstall AnyDVD in Windows. If there is any question you want to ask, feel free to leave comments at the bottom of the page.

Solution 1: Uninstall AnyDVD via Programs and Features & Registry Editor
Most people remove programs this way. After you install any new piece of software onto your computer, the program will be added to a list which you can find in the Windows Control Panel. In case you’re not yet familiar with the operations, I have listed all the necessary steps:
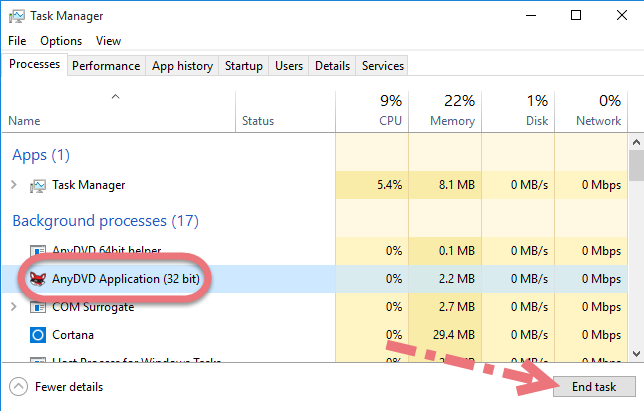
1. Quit the program in the background by using the Task Manager.
2. Right-click the Start button in the bottom-left corner of your screen, and select Control Panel.
3. Click the Uninstall a program link under Programs.
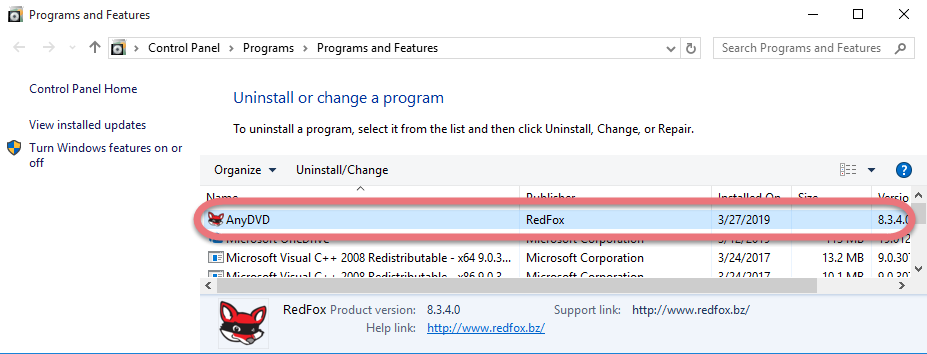
4. You’re presented with the list of Programs and Features (It’s called Add or Remove Programs in Windows XP). Locate and double-click AnyDVD in the list, and the removal will begin.
If you’ve made up your mind to uninstall AnyDVD, click “Yes/OK” when being asked for confirmation. Then wait until the uninstaller wizard finishes its job.
5. Hover your mouse in the bottom-right corner, and the charms bar will come out. Select Search, then type “regedit” in the box to open Registry Editor.
6. On the navigator of Registry Editor, select Edit > Find…, then enter “AnyDVD” to find the related file(s)/folder(s), right-click it(them) and click Delete to completely uninstall AnyDVD from your PC. Doing this will also remove all your personal settings on the program, just so you know.
BUT you should be careful while choosing your target to delete, because they can’t be returned once the deletion is confirmed.
7. Reboot your computer. If you were asked to do this and haven’t done it in Step 3, just leave it out.
Solution 2: Uninstall AnyDVD with A Reliable Tool
There are many tools you can easily get on the Internet, the hard part is which to choose. If you kinda lost your way, take my preparation – a good general-purpose tool that is available in most versions of Windows and works with types of programs:
1. Click the blue download button on the page to download & install Special Uninstaller, then run it.
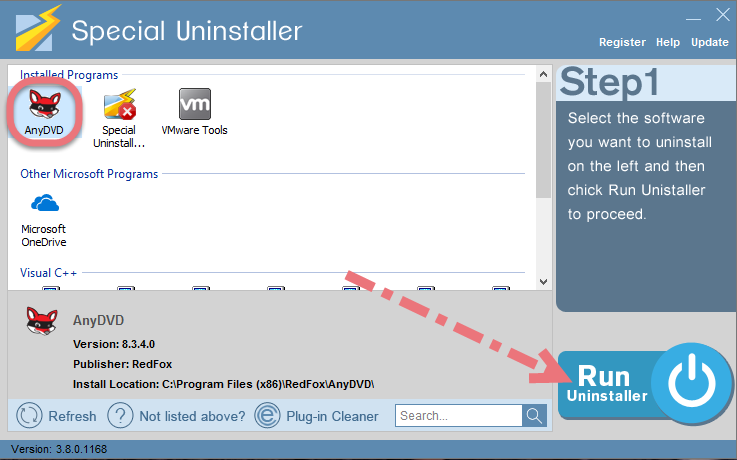
2. Find & select AnyDVD in the Programs list, and click Run Uninstaller.
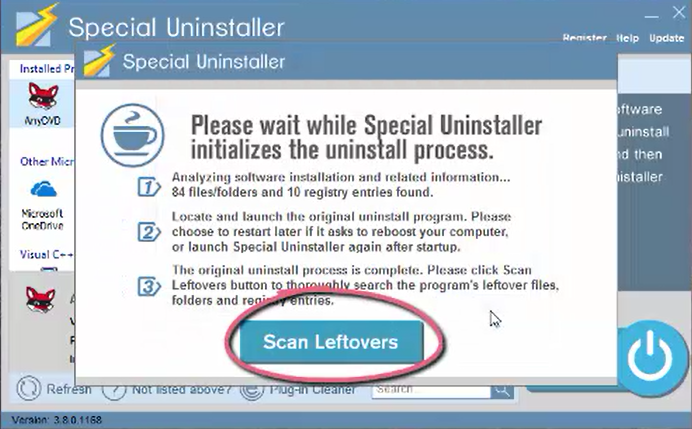
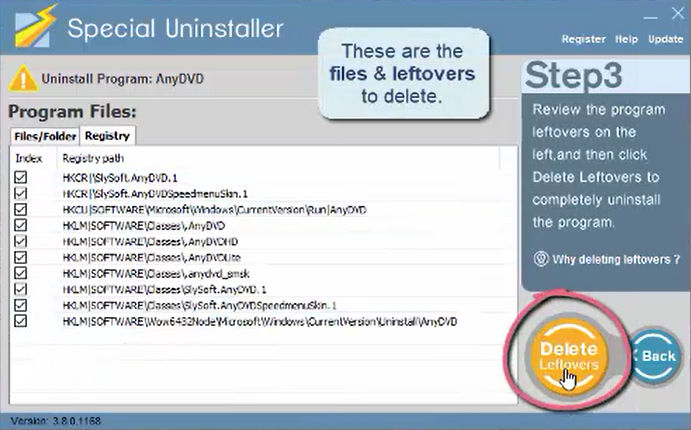
3. Follow the prompts to proceed with the removal, then click Scan Leftovers when you’re able to. Keep all the related items checked, and click Delete Leftovers to fully uninstall AnyDVD.
To check whether you’ve done the removal well, click “Back to Step1.” You will be brought back to the list, where you can see all the currently installed programs on the system.
Video Demonstration:
More to Learn: Using System Restore to Remove Programs
Every version of Windows OS since XP provides an option called System Restore that allows your computer to revert back to an earlier status, meaning you can uninstall AnyDVD and some other programs this way. In later versions of Windows, you can easily locate it by typing “restore” into the search tool of Start menu or the Start Screen on Windows 8. Specific steps are as follows:
1. Hover your mouse in the bottom-right corner, and the charms bar will come out. Select Search, type Restore in the box, and open Create a restore point. (If you’re asked for an administrator password for confirmation, type the password or provide confirmation)
2. On the System Protection tab, click “System Restore…”
3. If you don’t want to restore the system to the recommended point, click “Choose a different restore point” > “Next.”
4. Select the restore point you want then click “Next.” To view the drivers and programs that will be affected (which could include your target program and other programs that will be deleted), click “Scan for affected programs.”
5. At last, review the restore point, and click “Finish.”
Before trying any new piece of software that you’re not sure if it’s safe to run, I suggest using System Restore to literally “turn back time”, returning your PC to the status it was in before the new program is installed – Phew, that will deliver the equivalent results of wiping out the program like it never exists.
Leave a Reply